- Service Installation and First Start (Manager)
- First Login to the Administration Panel
- General Administrator Settings
- HTTP Access Settings and Network Availability
- Database Settings
Service Installation and First Start (Manager)
After receiving the software distribution package, the administrator extracts the archive into a permanent folder on the server (for example, D:\OrdiziService). It is not recommended to run the service from a temporary folder, downloads folder, or a directory that may be cleared by a user.
For initial service configuration, use the ordizi.manager.exe application. Run it as an administrator, because the manager installs, starts, stops, and removes the Windows system service.
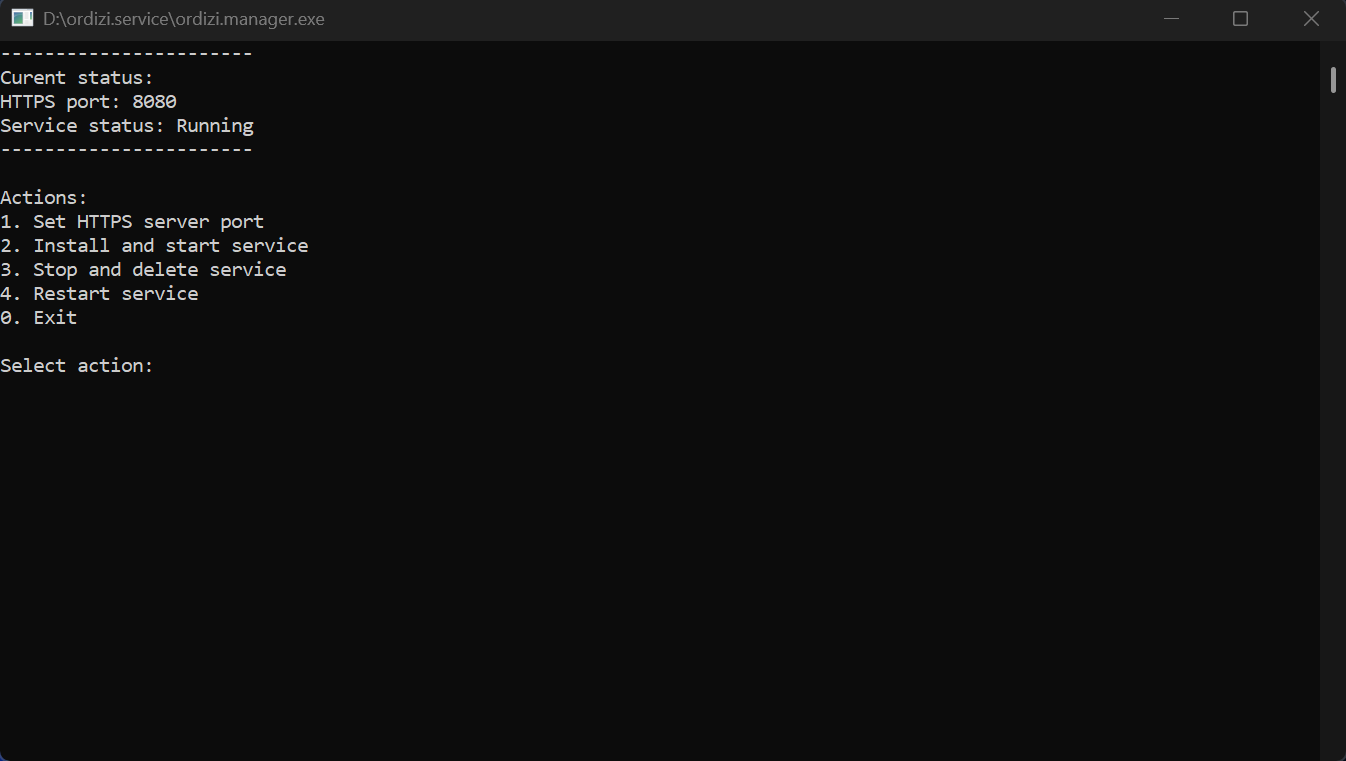
Service manager menu:
- Current status — Displays the current HTTP port and service status: Running, Stopped, or Not installed.
- 1. Set HTTPS server port — Allows you to specify the port used by the administration panel and the interface for mobile clients (valid range: 1..65535).
- 2. Install and start service — Installs the Windows service and starts it. After a successful start, the status should change to Running.
- 3. Stop and delete service — Stops and removes the Windows service. Use this option only when uninstalling or reinstalling the service.
- 4. Restart service — Restarts the Windows service.
- 0. Exit — Closes the manager.
Port: The port selected in the manager must match the HTTP port in the service settings. If the port is changed after installation, restart the service or application for the change to take effect.
Running from the command line
The manager can also be used from the command line:
ordizi.manager.exe status
ordizi.manager.exe set-port 8088
ordizi.manager.exe install
ordizi.manager.exe restart
ordizi.manager.exe uninstall
First Login to the Administration Panel
The administration panel is available in a browser at https://<server_or_localhost>:<port>/admin (or via HTTP if HTTPS is not used).
Initial credentials on first startup:
- Login:
admin - Password:
admin

Security: After the first login, be sure to change the administrator username and password.
General Administrator Settings
The following administrative access parameters are configured on the general settings page:
- Administrator username — Username used to log in (after the first startup, replace
adminwith your own username). - Administrator password — New administrator password.
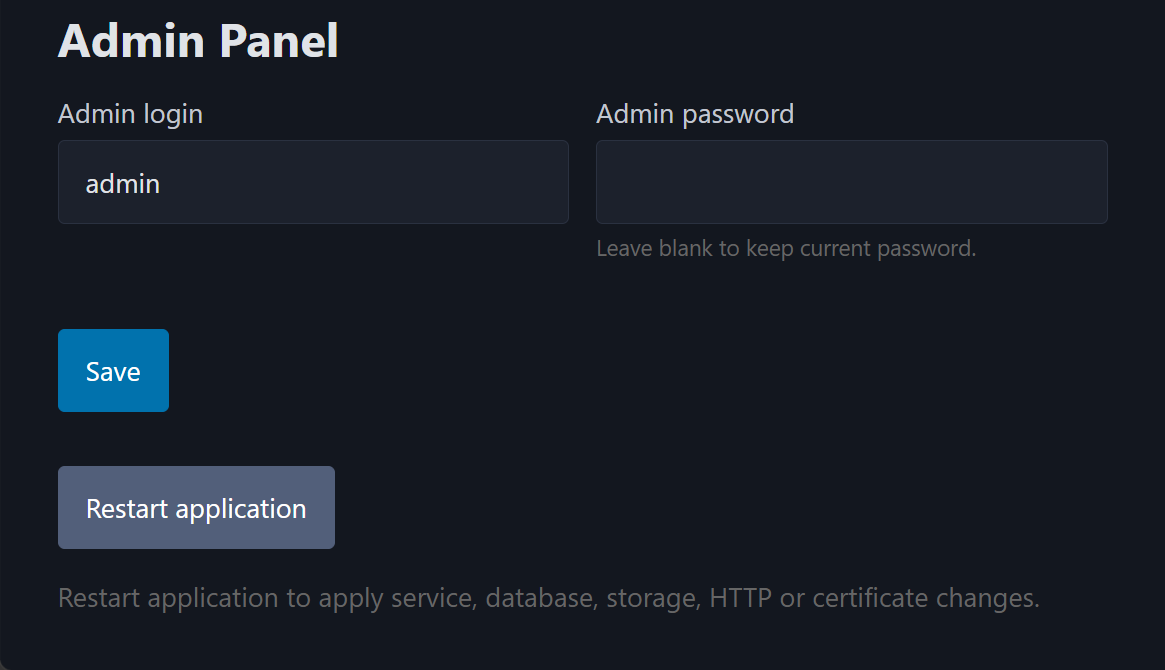
Passwords: The previously saved administrator password is not displayed in the interface. This is expected behavior. If the password field is left empty, the existing password is retained. Fill in this field only when changing the password.
HTTP Access Settings and Network Availability
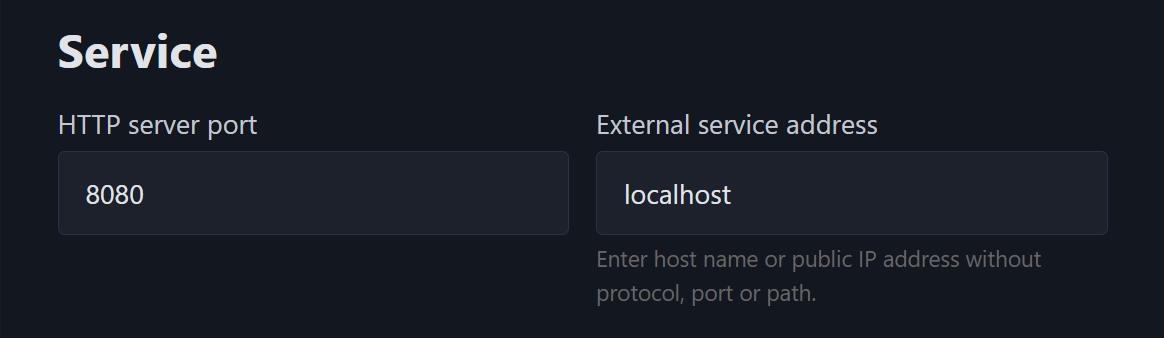
- HTTP port — The port used by the administration panel and the service’s HTTP/HTTPS interface for mobile clients. Changing it requires restarting the application or service.
- Service address — The external address at which mobile devices access the server (for example:
server.company.local,192.168.1.10, orordizi.company.ru). Specify it without the protocol or URL prefix. Used to generate the section’s connection endpoint.
Port availability for mobile clients
For the “Ordizi Agent” mobile application to connect to the service, check the following network settings:
- Firewall: the service’s inbound TCP port must be allowed in Windows Firewall or the Linux server firewall.
- Organization firewall: the port must be allowed between the mobile client network and the server.
- NAT, VPN, or reverse proxy: the external address and port must route to the Ordizi Service server.
- DNS: the name specified in the “Service address” field must resolve to the correct server.
- HTTPS certificate: if HTTPS is used, the certificate must be trusted by the mobile devices.
Database Settings
The service stores operational data and section settings in a database. During initial configuration, it is recommended to create a new database using the administration panel.
Database connection fields:
- Database type — Select the DBMS type: MSSQL, PostgreSQL, or MySQL.
- Server — Database server address (for example:
localhost,192.168.1.10). - Port — Database connection port (PostgreSQL — 5432, MySQL — 3306).
- Database — Name of the new database that the service will use.
- Windows authentication — Used for MSSQL. If enabled, the service connects to SQL Server using the account under which the service is running.
- Database user and Database password — Database credentials (the previously saved password is not displayed in the interface).

Creating and verifying the database
- “Check DB” button — Checks the database connection using the specified parameters. It does not create the database or modify its structure.
- “Create DB” button — Creates a new database and the required tables. After successful creation, the current connection settings are saved.
Limitation: The “Create DB” button is intended for a new database. Do not specify an existing old database as the new working database, and do not use this button with an old database unless you are certain of its version and structure. If you need to connect a restored database, the administrator must ensure that it matches the same server version.