- Creating an exchange section
- Section fields
- URL prefix and folder name
- How Import and Export folders are created
- Saving a section
- How file import and export work
- Deleting and clearing a section
Creating an exchange section
Open the sections page at https://<server_or_localhost>:<port>/admin/partitions, or go to “Sections”/Partitions using the menu in the upper-right corner of the administration panel.
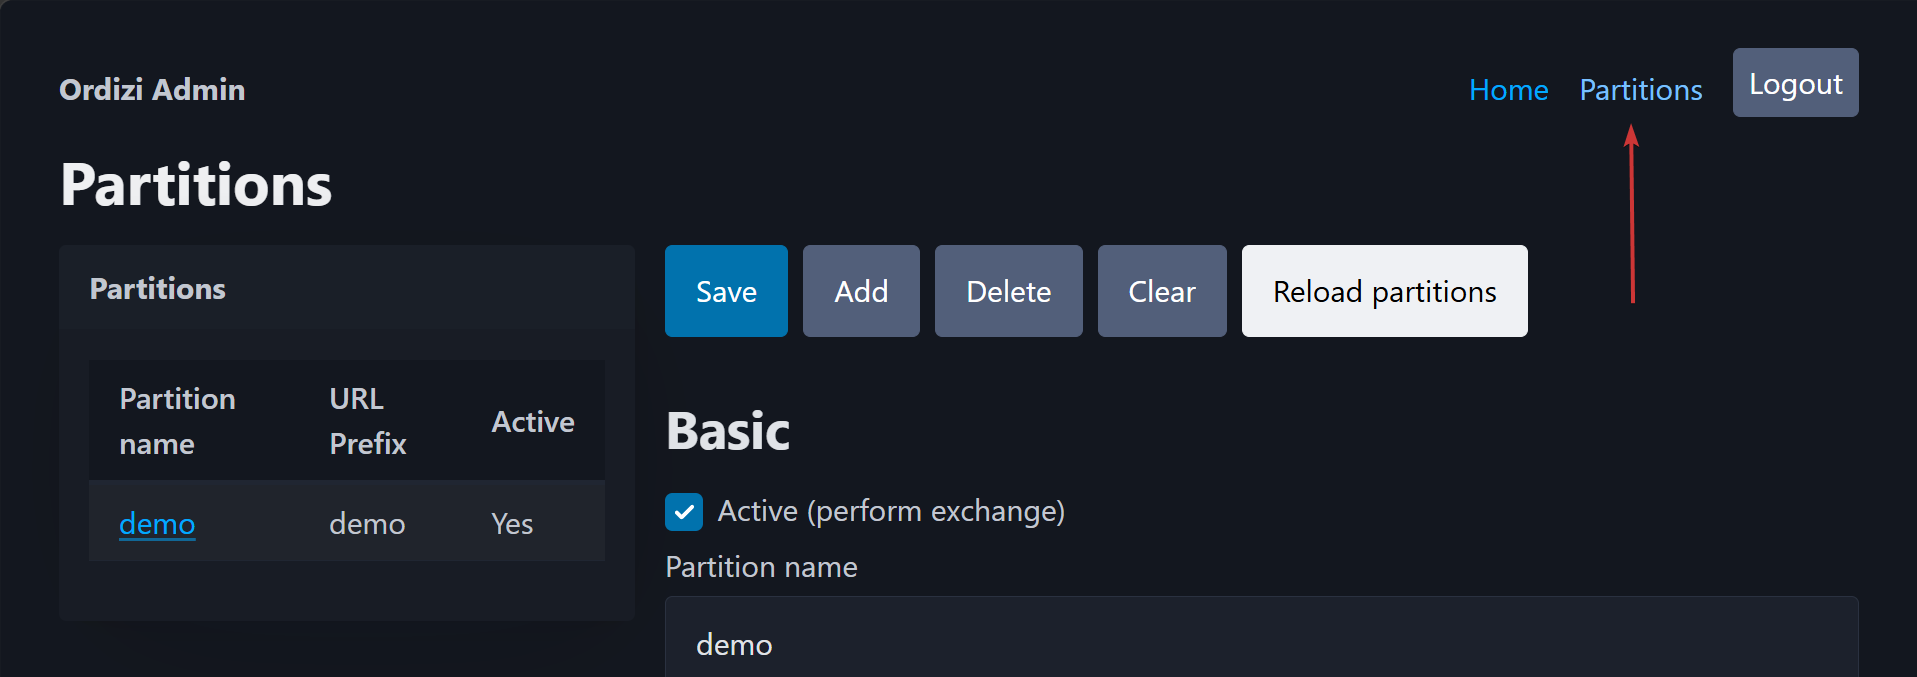
A section defines a separate exchange area. Each section has its own URL prefix for client connections and its own exchange folder for the ERP system.
Saving process: When saving a section, the service first validates the fields, then checks or creates the
ImportandExportfolders, and only then writes the section to the database. If the folders cannot be created, the section is not saved.
Section fields
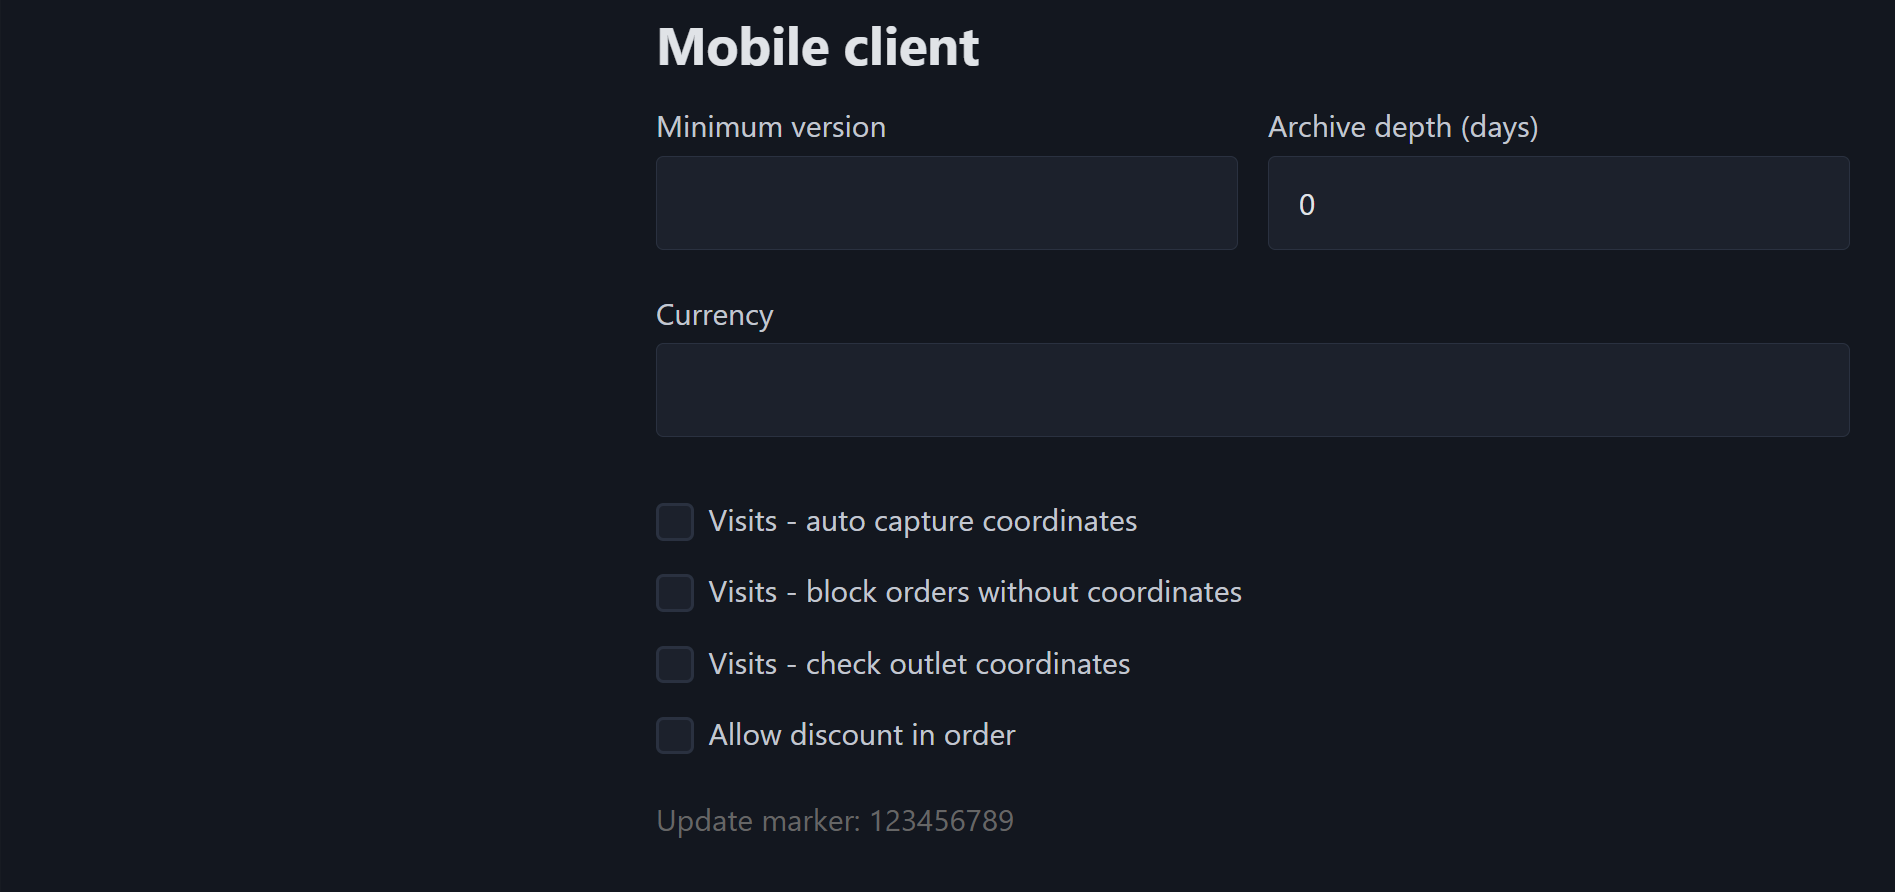
- Active — Enables or disables the section. If the section is inactive, exchange with the ERP system and mobile client connections to this section are disabled.
- Section name — A descriptive section name for the administrator (for example: “Main warehouse”, “Client A”, “Region 01”).
- URL prefix — The connection endpoint for mobile clients accessing this section. The value must be unique and must not contain the “/” character.
- Connection endpoint — The complete address for connecting the “Ordizi Agent” mobile application to this section. It is generated automatically from the service address, HTTP port, and URL prefix. The value can be copied using the button next to the field and provided to the user.
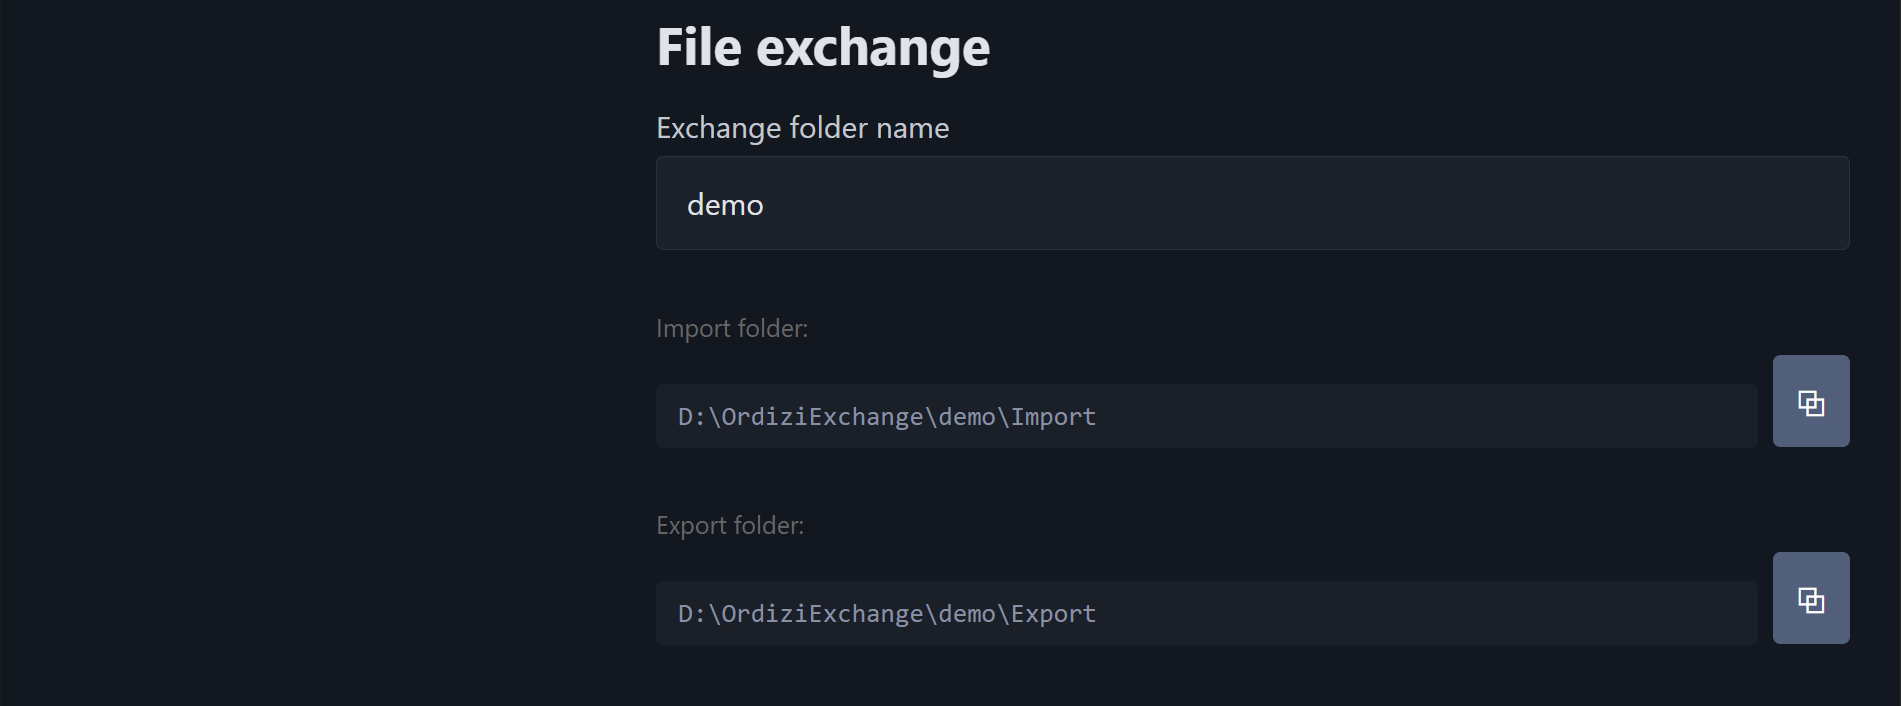
- Section exchange folder name — The name of a single section folder only. This is not a full path. The service automatically adds the root folder,
Import, andExport. - Minimum version — The minimum mobile client version allowed to work with this section.
- Archive depth — The number of days created documents are stored on the mobile client.
- Application currency — The currency displayed in the mobile client interface.
- Automatically obtain GPS on visit — The mobile client will attempt to obtain GPS coordinates when a visit starts.
- Prevent visits without GPS — If coordinates cannot be obtained, the mobile client will not allow the user to start or complete a visit without GPS.
- Check coordinates — Enables coordinate validation on the mobile client.
- Use discounts — Enables discounts for mobile clients in this section.
URL prefix and folder name
How the client URL is formed (URL prefix)
In the general settings, the “Service address” specifies the external address used by mobile devices to access the server. Together with the HTTP port and the section URL prefix, the service generates the complete connection endpoint:
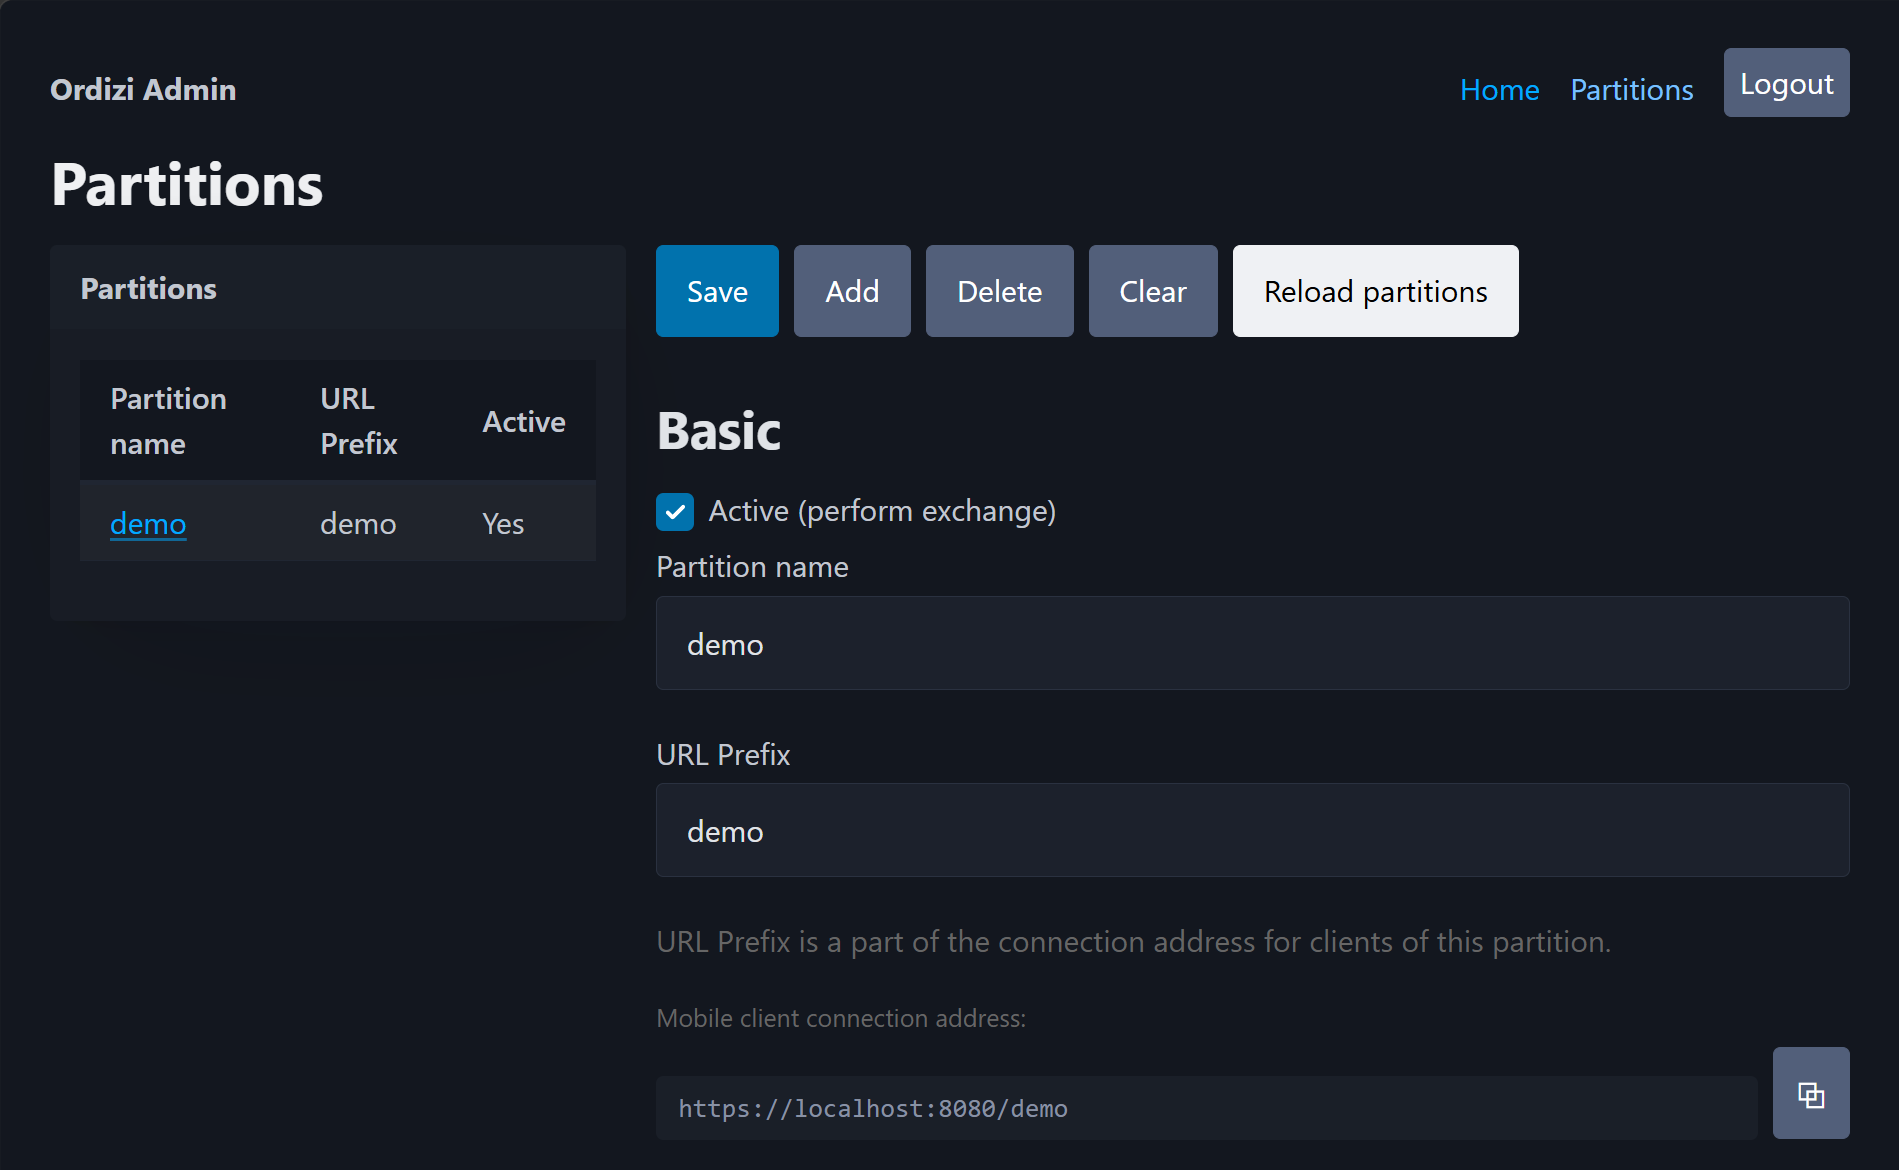
https://<service address>:<HTTP port>/<URL prefix>In the section form, the connection endpoint is displayed automatically below the “URL prefix” field. A button next to the field allows you to copy it to the clipboard.
Uniqueness: The URL prefix must be unique. You cannot create two sections with the same URL prefix.
Section exchange folder name
Section exchange folder name
- Correct:
client_a,shop01,region01. - Incorrect:
D:\Exchange\client_a,/client_a,client_a/import,client\a.
Rule: The folder name must not contain “/” or “\”, must not be “.” or “..”, and must not contain characters that are not allowed in file names.
How Import and Export folders are created
The “Import folder” and “Export folder” fields in the section form show the resulting paths. These fields are provided for administrator verification and cannot be edited manually. A button next to each path allows you to copy it to the clipboard.
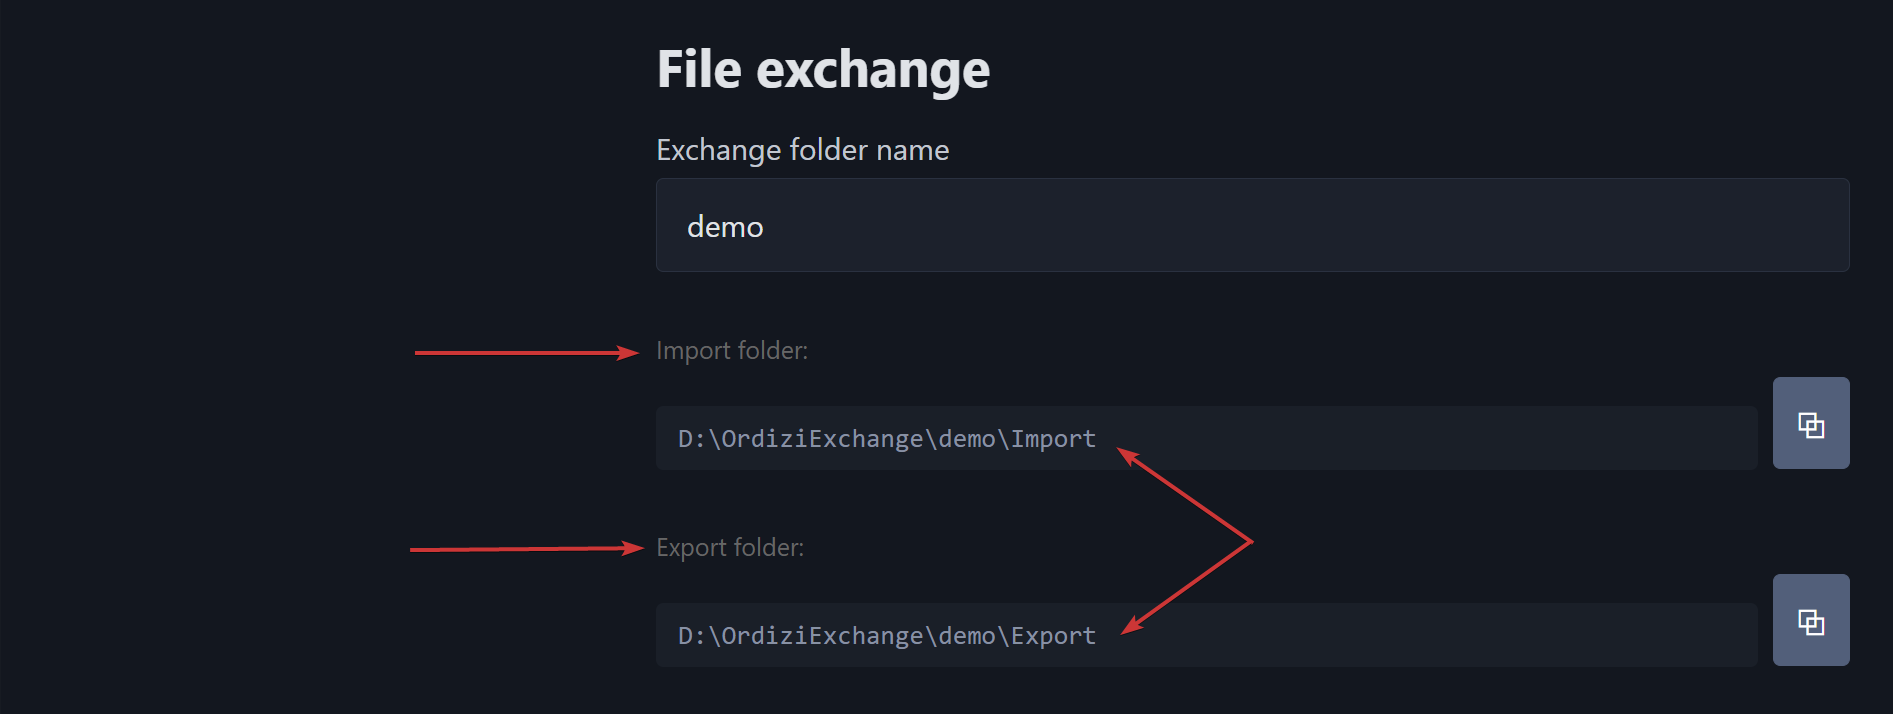
- Local folder:
<Local exchange root folder> + <Section exchange folder name> + Import/Export. - FTP:
<Section exchange folder name> + Import/Exportin the FTP user’s current working directory.
Saving a section
To save the section, click the “Save” button in the top menu. The following procedure is performed when saving:
- Required section fields are validated.
- The URL prefix is checked for uniqueness.
- The section exchange folder name is validated.
- The file exchange settings are validated.
- The section folder is checked or created.
- The
Importsubfolder is checked or created. - The
Exportsubfolder is checked or created. - If all checks are successful, the section is saved to the database.
- If an error occurs, the section is not saved, and the administrator receives a message explaining the reason.
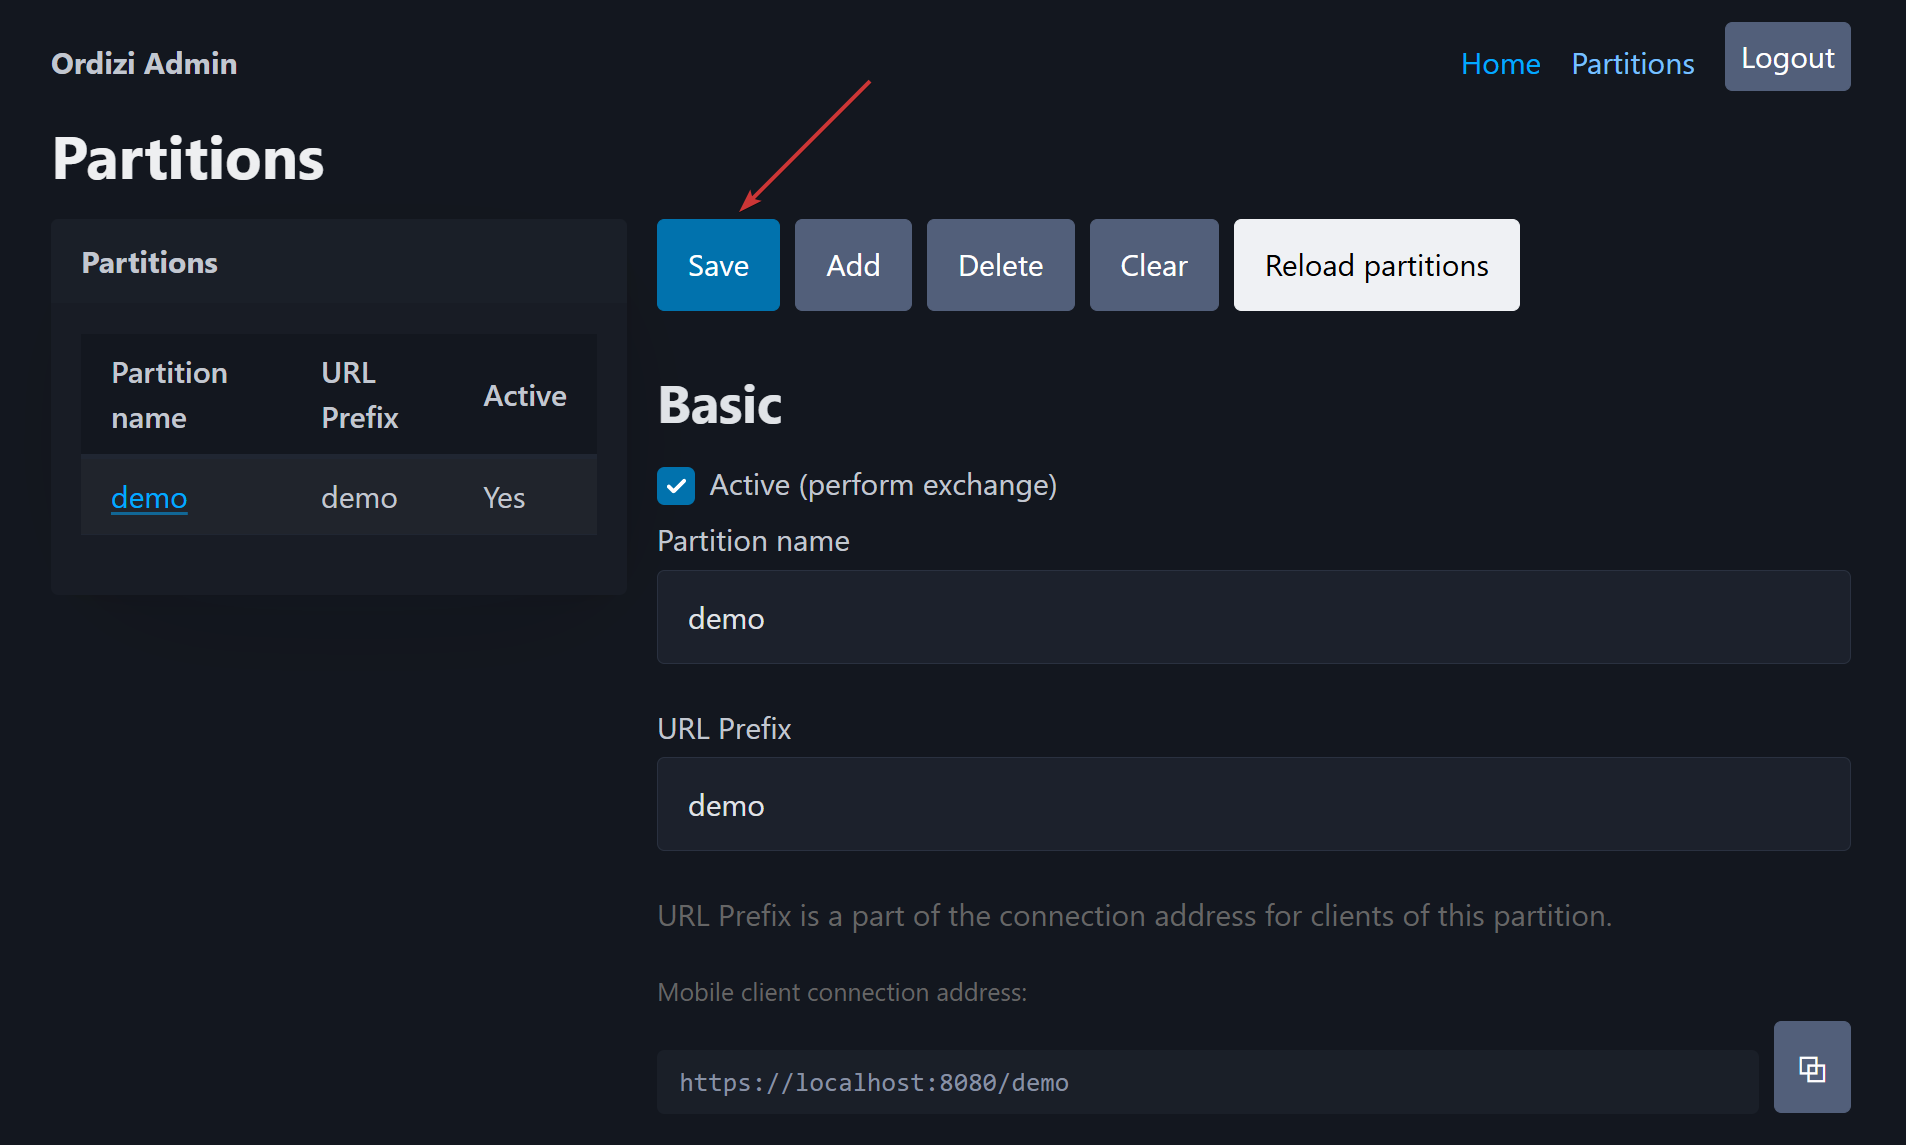
Logic: This sequence prevents sections from being added to the database if the service cannot create their required exchange folders.
How file import and export work
Import from the ERP system
Import is the process of loading incoming files exported by an ERP system, such as 1C, for the service.
- The ERP system exports XML files to the
Importfolder. - The ERP system updates the
update.txtservice file. - At each import interval, the service checks
update.txt. - If the marker has changed, the service starts importing the files.
- The data is loaded into the service database.
Export to the ERP system
Export is the process of generating outgoing files for an ERP system, such as 1C. At each export interval, the service generates files in the selected section’s Export folder. The ERP system retrieves these files according to its configured exchange procedure.
Deleting and clearing a section
- Delete section — Deletes the section from the database. Exchange folders on disk or FTP are not deleted.
- Clear data — Deletes the section’s operational data from the database tables while keeping the section itself and its exchange folders.
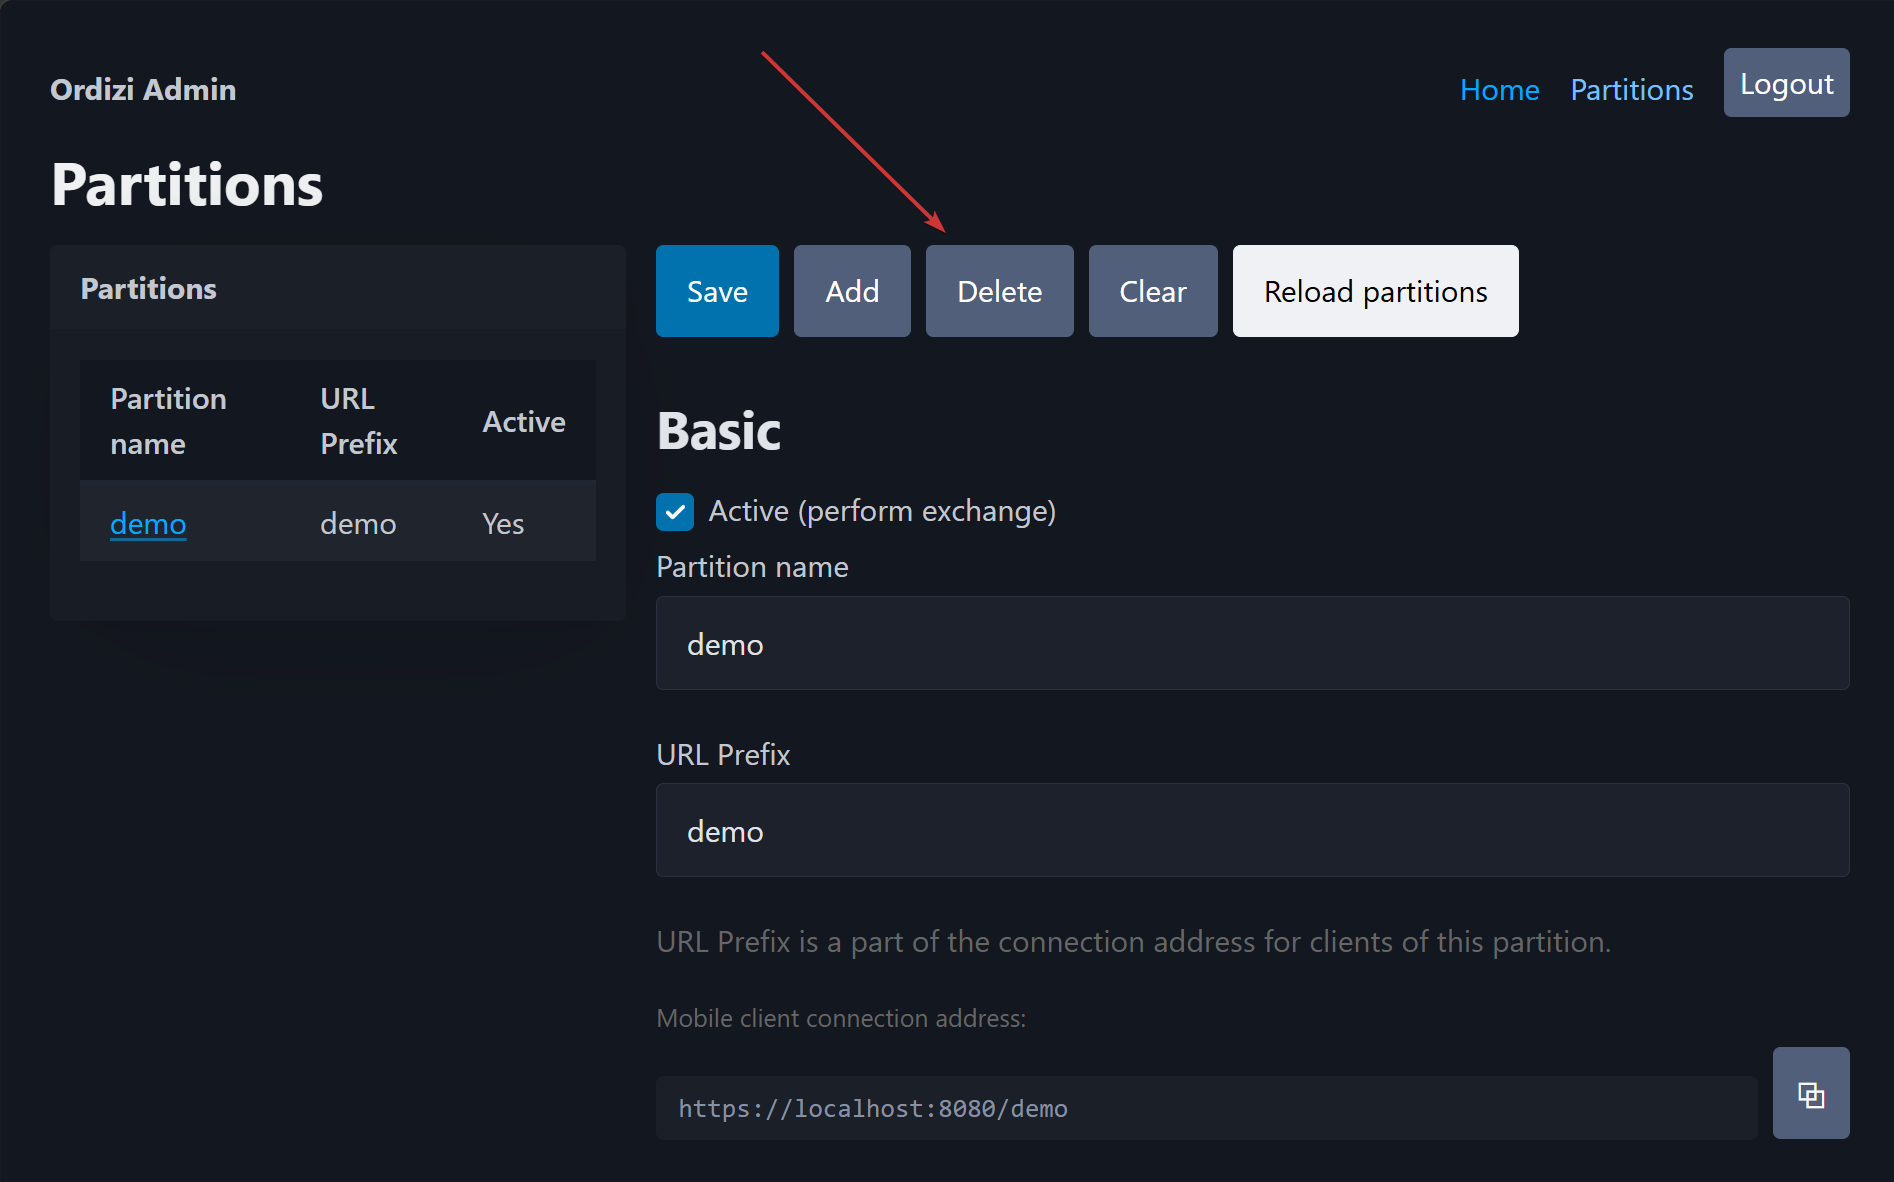
Deleting folders: Exchange folders are intentionally not deleted when a section is removed to prevent accidental loss of exchange files. If the folders are no longer needed, the administrator must delete them manually.