Program Purpose
Ordizi Service is a server-side data exchange service. It connects the database, mobile clients, and accounting systems, such as 1C.
Exchange with accounting systems is performed via file exchange folders. A separate folder is created for each section, inside which the service uses two service subfolders:
Import— Incoming files folder. The accounting system exports files here that the service needs to import.Export— Outgoing files folder. The service generates files here to be transferred to the accounting system.
Important: File exchange in the service settings refers specifically to the exchange with accounting systems, such as 1C. Mobile clients connect via the HTTP/HTTPS interface of the service.
Quick Start: End-to-End Example
Below is the complete setup cycle—from unpacking the archive to loading test data and connecting the mobile app.
1. Installation and startup of the service
- Unpack the program distribution archive into a permanent folder on the server (for example,
D:\OrdiziService). - Run
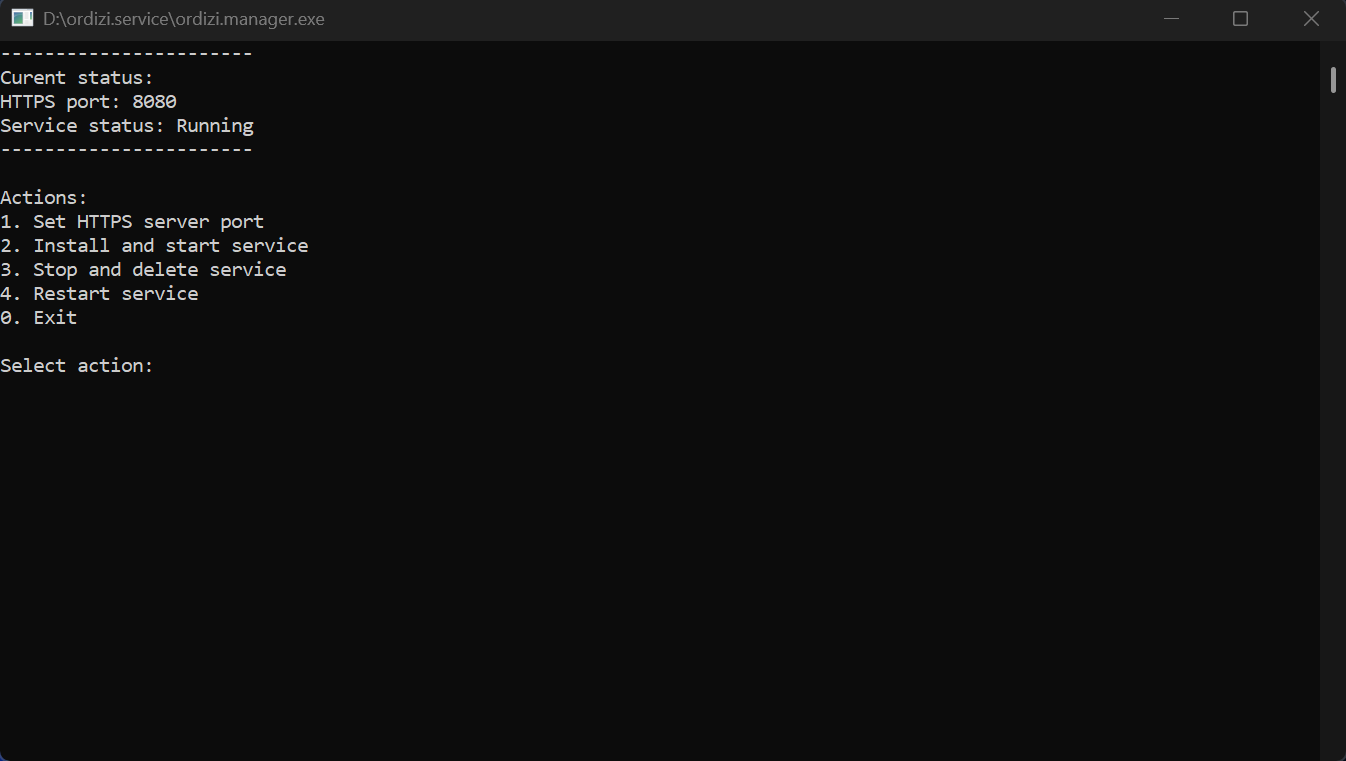
ordizi.manager.exeas an administrator. - In the opened manager, select “1. Set HTTPS server port” and specify the port, for example
8080. - Select “2. Install and start service” to install and start the service.
- Ensure that the service status has changed to “Running”.
2. Server login and configuration
- Open the admin panel in your browser at
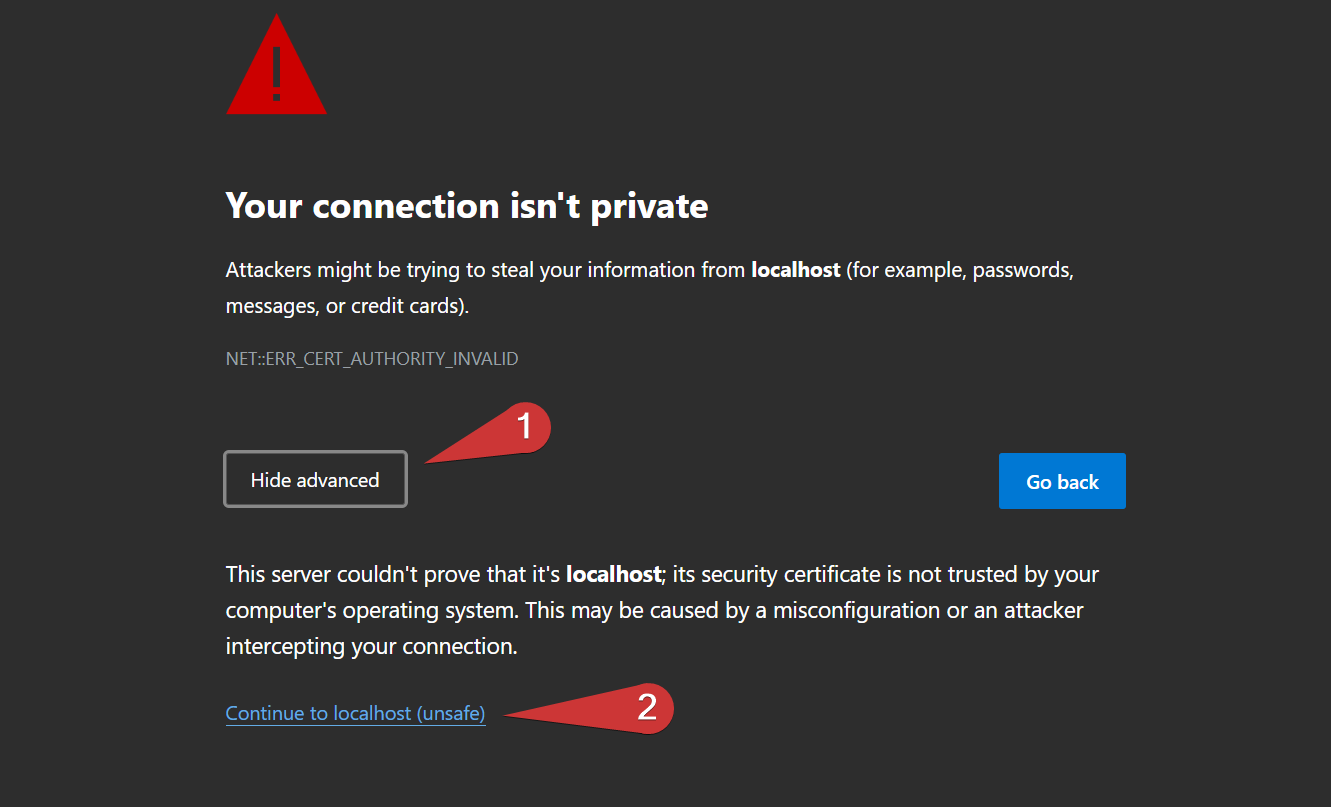
https://localhost:8080/admin(if the setup is performed locally on the server itself). The browser may block the connection because a self-signed certificate is used. Click “Advanced/Details” (the label may vary by browser) and then “Proceed to localhost”.
- Log in using the initial credentials: username
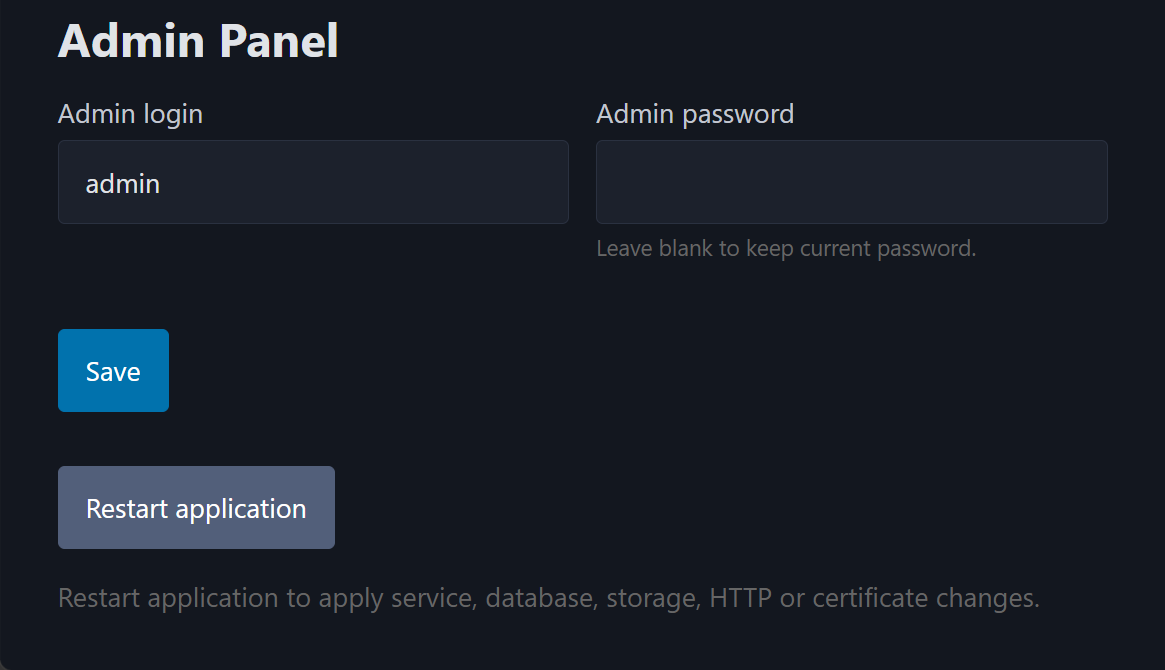
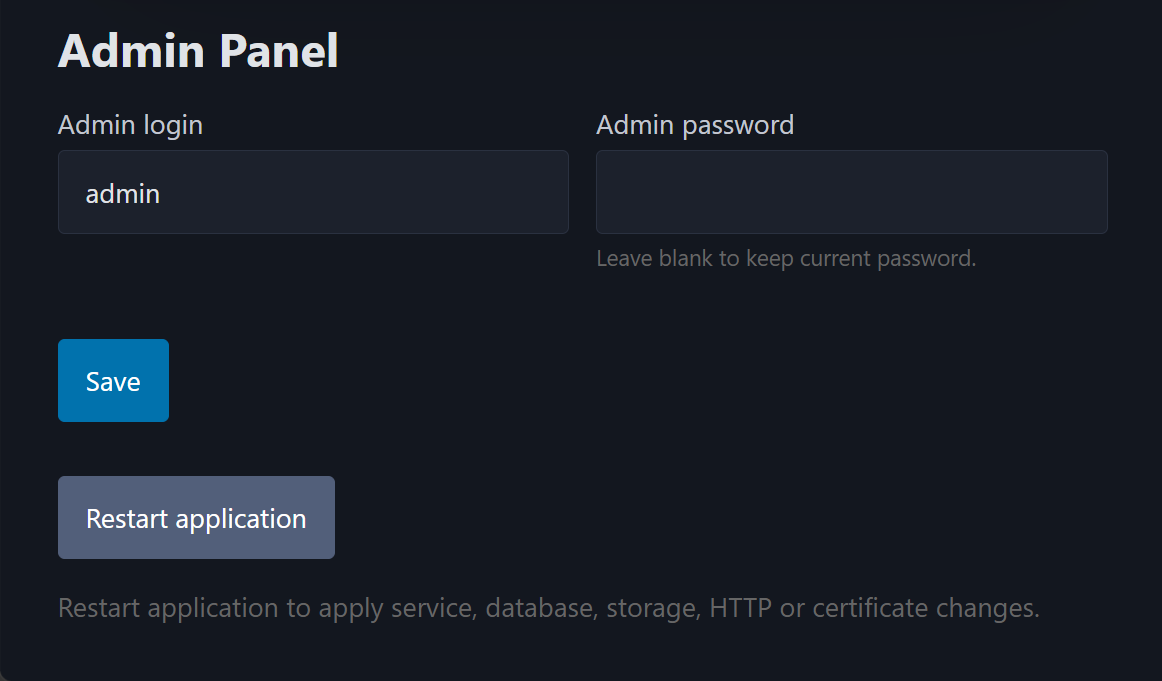
admin, passwordadmin. - In the “Admin panel” block (located at the very bottom of the page), be sure to change the administrator password.
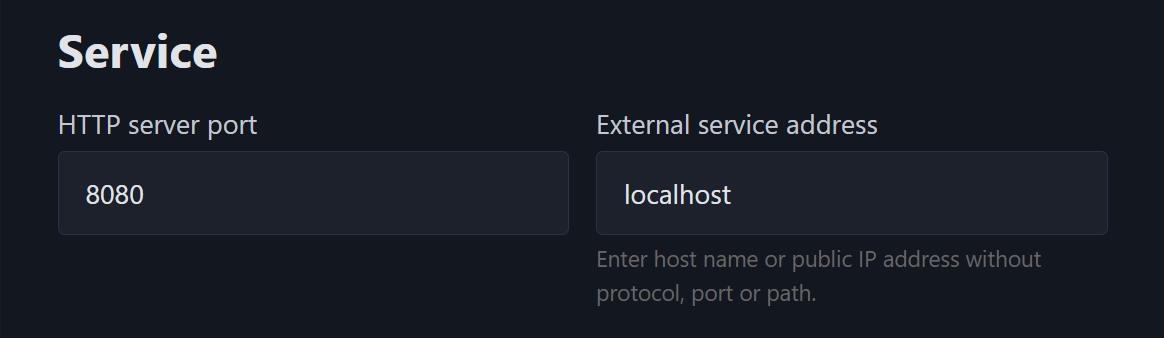
- To configure HTTP access, enter the service address in the “Services” block. For testing on a local network, specify the server’s IP address in the same block (for example,
192.168.1.10), and for a remote server (such as a VPS), specify its external IP address or domain.
- In the “Database connection” block, specify the connection parameters, enter the name of the new database, and click “Create DB”. Supported types include “MSSQL”, “PostgreSQL”, and “MySQL”.

- In the “File exchange” block, select the “Local folder” mode and specify the pre-created root exchange folder (for example,
D:\OrdiziExchange).
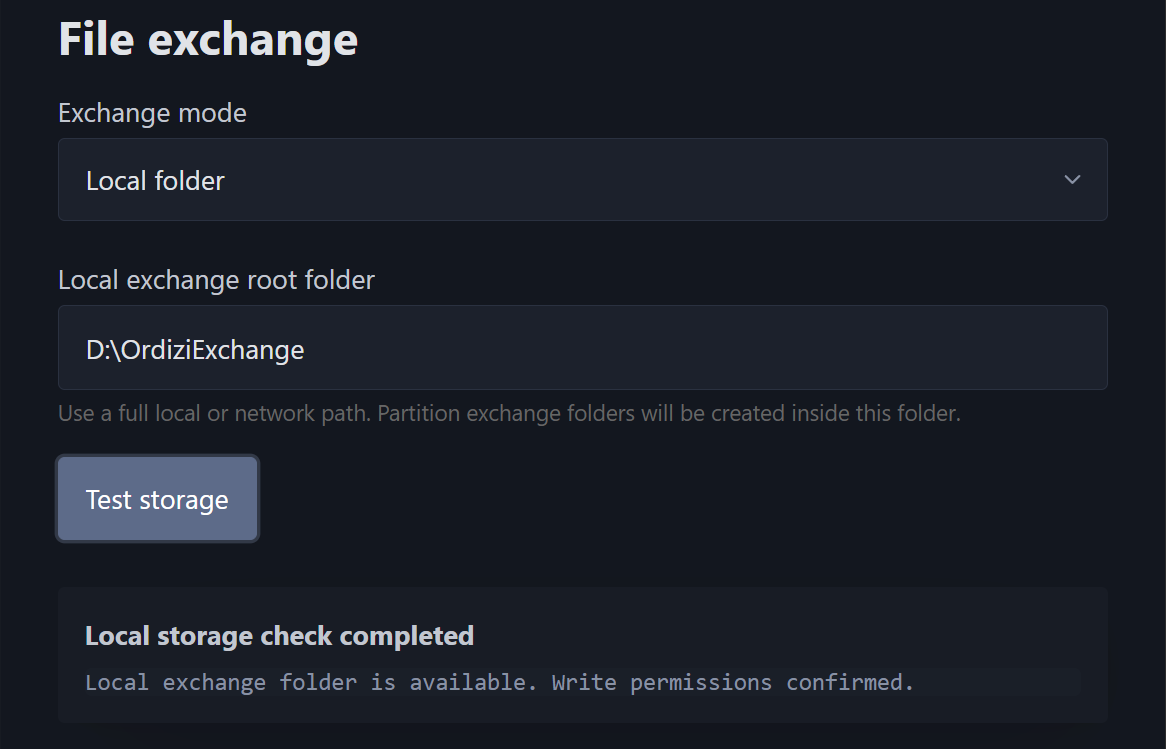
- Click “Save settings” and “Restart application”.
3. Port opening (Firewall)
- To connect mobile clients, make sure the selected HTTP port (
8080in our example) is open for incoming connections in the Windows Firewall (or Linux server firewall), as well as in the organization’s network firewall.
4. Demo section creation
- Go to the “Sections” page.
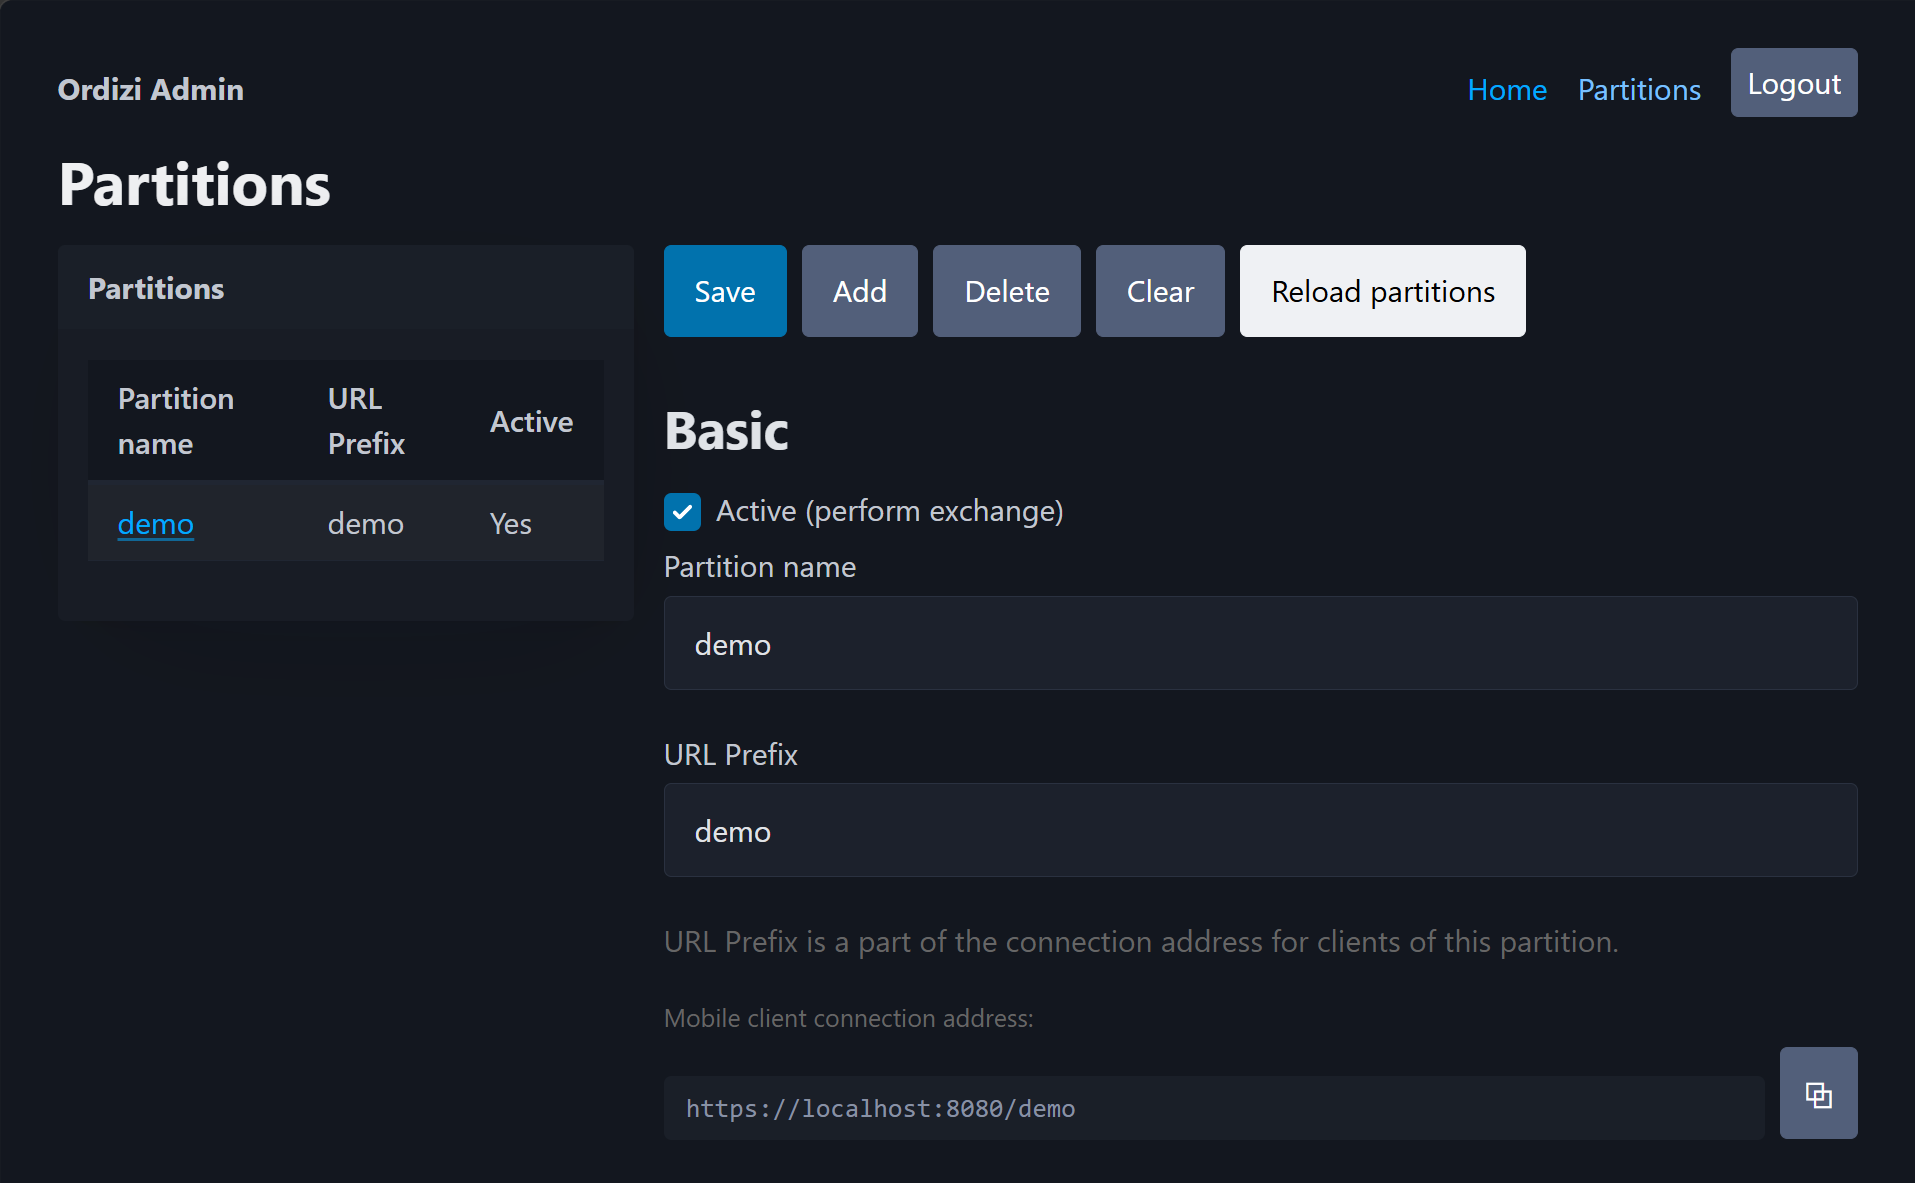
- Fill in the main section fields:
- Section name: Demo
- URL prefix: demo
- Check the box next to “Active (perform data exchange)”
- Exchange folder name: demo
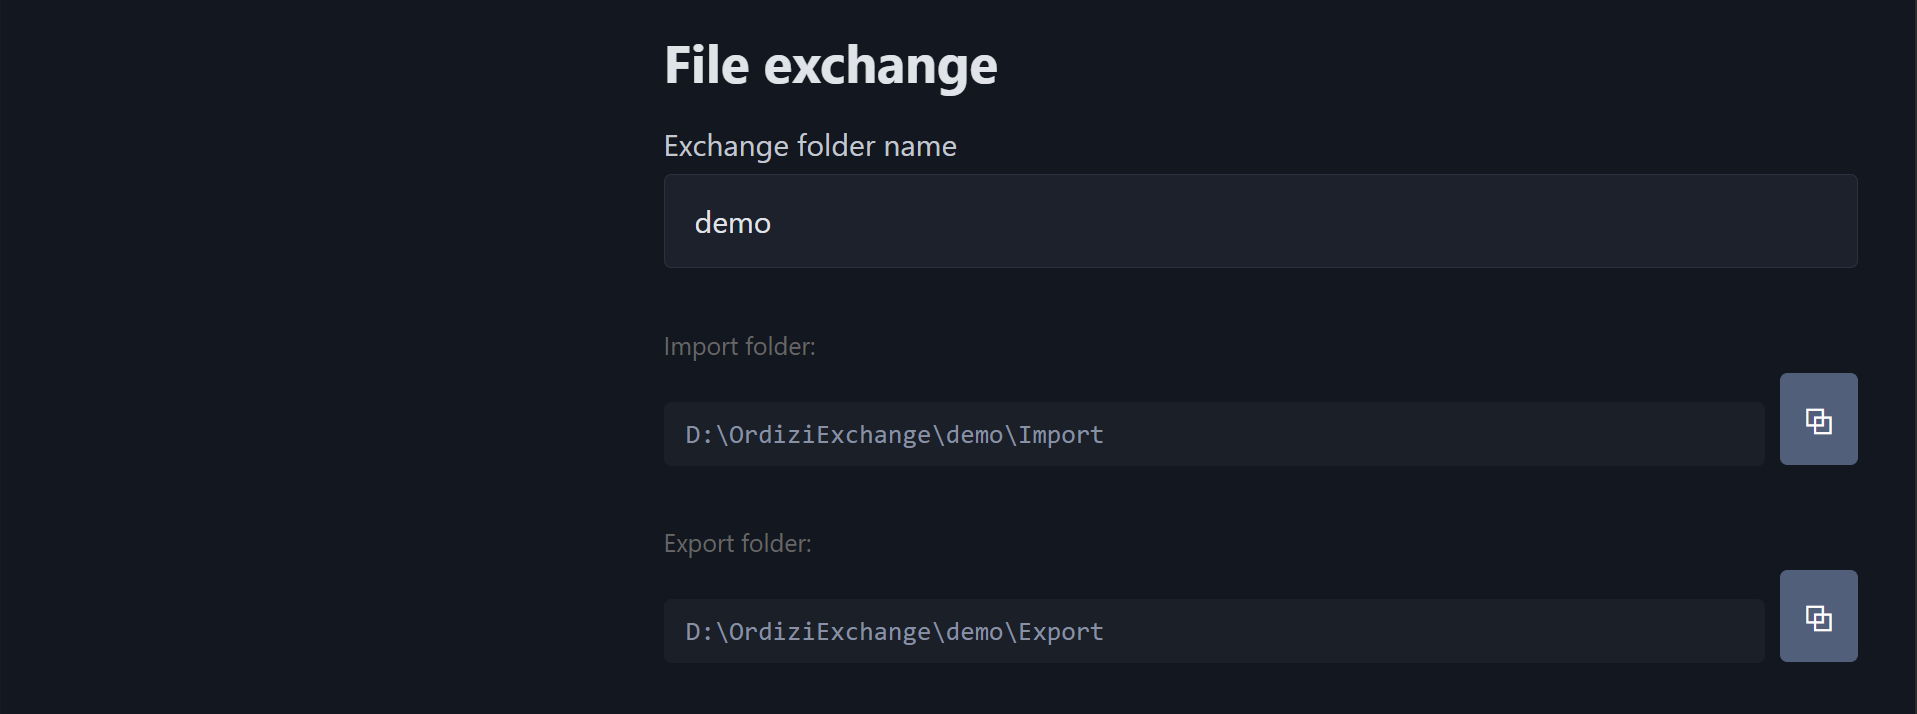
- Click “Save section”. The service will automatically create
ImportandExportsubfolders within the section’s exchange folder.
5. Import test data
- Take the sample files from the
demofolder in the ordizi.service program directory (included in the archive). The service fileupdate.txtcontaining an arbitrary string is located in the same folder. - Copy all of these files into the incoming files folder created by the server (
Import). - The server will automatically pick up the newly copied data after the configured import interval. Upon successful loading into the database, the files will disappear from the exchange folder.
6. Connecting Mobile Client Ordizi-Agent
- Download and install the “Ordizi-Agent” client application on your Android device.
- Review the application documentation: Ordizi-Agent Quick Start
- Configure the connection in the app and perform synchronization using the following details:
- Link (connection endpoint):
http://<внешний_IP_или_IP_в_локальной_сети>:<порт>/demo_en- Username:
Smith - Password
1234
Quick Checklist for Initial Setup
- Extract the software delivery archive into a permanent folder on the server.
- Run
ordizi.manager.exeas administrator. - Select “Set HTTP server port” and specify the service port.
- Select “Install and start service”.
- Verify that the service has Running status.
- Open the admin panel:
https://<server_or_localhost>:<port>/admin. - Log in using
admin/admin. - Change the administrator username and password.
- Specify the HTTP port and external service address.
- Fill in the database parameters.
- Create a new database or connect a restored database of the same server version.
- Configure the file exchange mode with the accounting system.
- For local mode, create the root exchange folder in advance and check service permissions.
- For FTP, verify the address, port, username, password, SSL, and user permissions.
- Click “Test Storage”.
- Click “Save Settings”.
- If required, click “Restart Application”.
- Open the “Sections” page.
- Create a section by entering the name, URL prefix, and exchange folder name.
- Verify the connection endpoint for “Ordizi Agent” and the Import/Export paths.
- Click “Save Section”.
- Ensure the section is saved and the Import and Export folders are prepared.
- Copy the connection endpoint and forward it to the “Ordizi Agent” mobile app user.
- Verify that the service port is open for mobile clients.